Specific gravity testing is a tremendously useful testing method used in mineralogy to identify the density of a material from the known density of another material, generally water.
It is one of the most effective tests that can be done at home, but it does have its limitations.
Pros:
- Very easy way to identify mineral samples.
- No particularly expensive equipment.
- No dangerous chemicals or processes.
- Relatively portable, can be done in the field if necessary.
Cons:
- Can only be used for homogenous mineral samples – for example, a piece of Quartz with no inclusions. It could not be used to identify a Sapphire in Mica, for example – as this test only able to identify the density of a single substance at a time.
- Takes some time to set up.
- Requires some equipment.
- This ‘hack’ method is not as accurate as it could be.
- Occasional splashes 🙁
So, what do you need?
- A scale:
- First of all, you need a relatively decent digital scale. I’m not talking tested and approved for trade, but a scale that can measure up to 500 (or 1000) grams in 0.01g steps ideally. 0.1g may work, but the more accurate your scale, the more accurate the results. However, if you already have a gemological scale, I’d recommend getting a second slightly cheaper one for this testing process as it does involve water and spills can happen.
- I have used a 500g scale and a relatively large tub of water; this could be done on a smaller scale for smaller specimens if required – I wanted to be able to do larger pieces too.
- A plastic tub
- A felt tip pen, or a tube around 0.8MM I/D and around 10-15CM long.
- A laboratory test tube stand and clamp – I got a dirt cheap one off eBay similar to this.
- Internet access
- A calculator
- A few bits of wire, string, tape etc.
- A bit of steel or plastic mesh.
Most of these are pretty generic, the scale is the only real expense here. You can gather the kit for under £40 if you try – £20 or so if you choose a 0.1g scale, but if you buy a cheaper one, make sure to test it with a known test weight. Some are very inaccurate.
Got it. Now, what am I doing?
Alright, time to assemble this… mad contraption.
Step 1: The first thing you’ll have to do is assemble the lab stand, which is easy enough.
Step 2: Hacksaw both ends off your felt tip pen. Yup. If you have a tube you can skip that step, though. Chuck the ink and lid away.
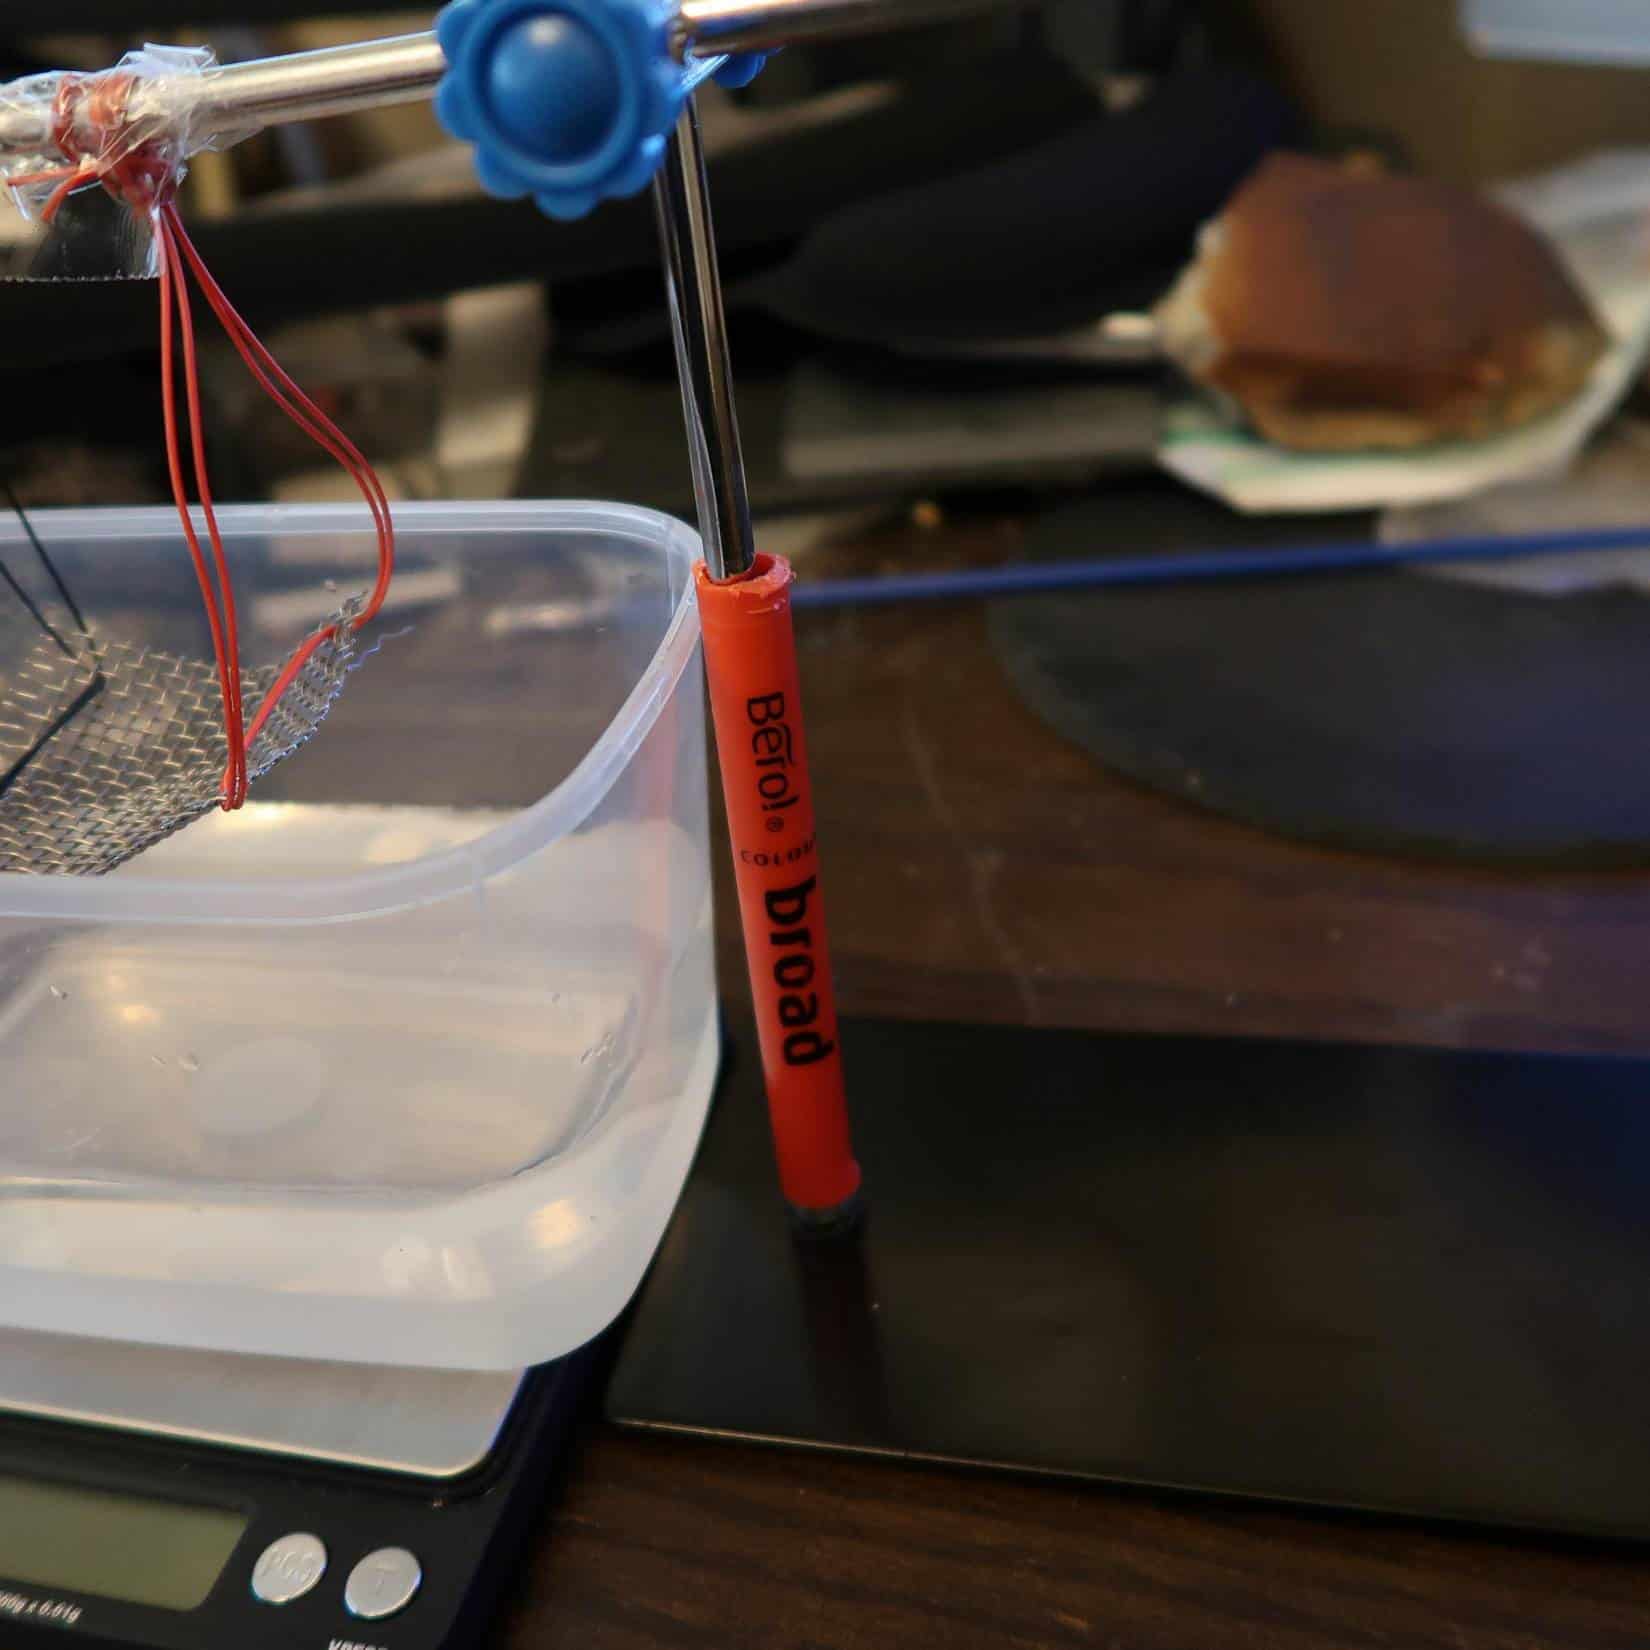
Step 3: Fit the tube over the central pole of the lab stand. This will stop the stands arm from dropping too far, and make sure it remains at a constant level, very important for the tests.
Step 4: Make a little basket out of something lightweight that will survive being wet – I used a piece of steel grille I had lying around, and some thin copper wires from an old cable.
Step 5: Attach the basket to the lab stand arm, hanging down. I tied and taped it, trying to make the whole basket hang level. It needs to be connected at a length that makes it impossible for the ‘basket’ to touch the bottom of the water container.
Step 6: Attach the lab stand arm to the lab stand. Done.
Alright. Probably about time for some photos to help illustrate what I’m actually talking about!
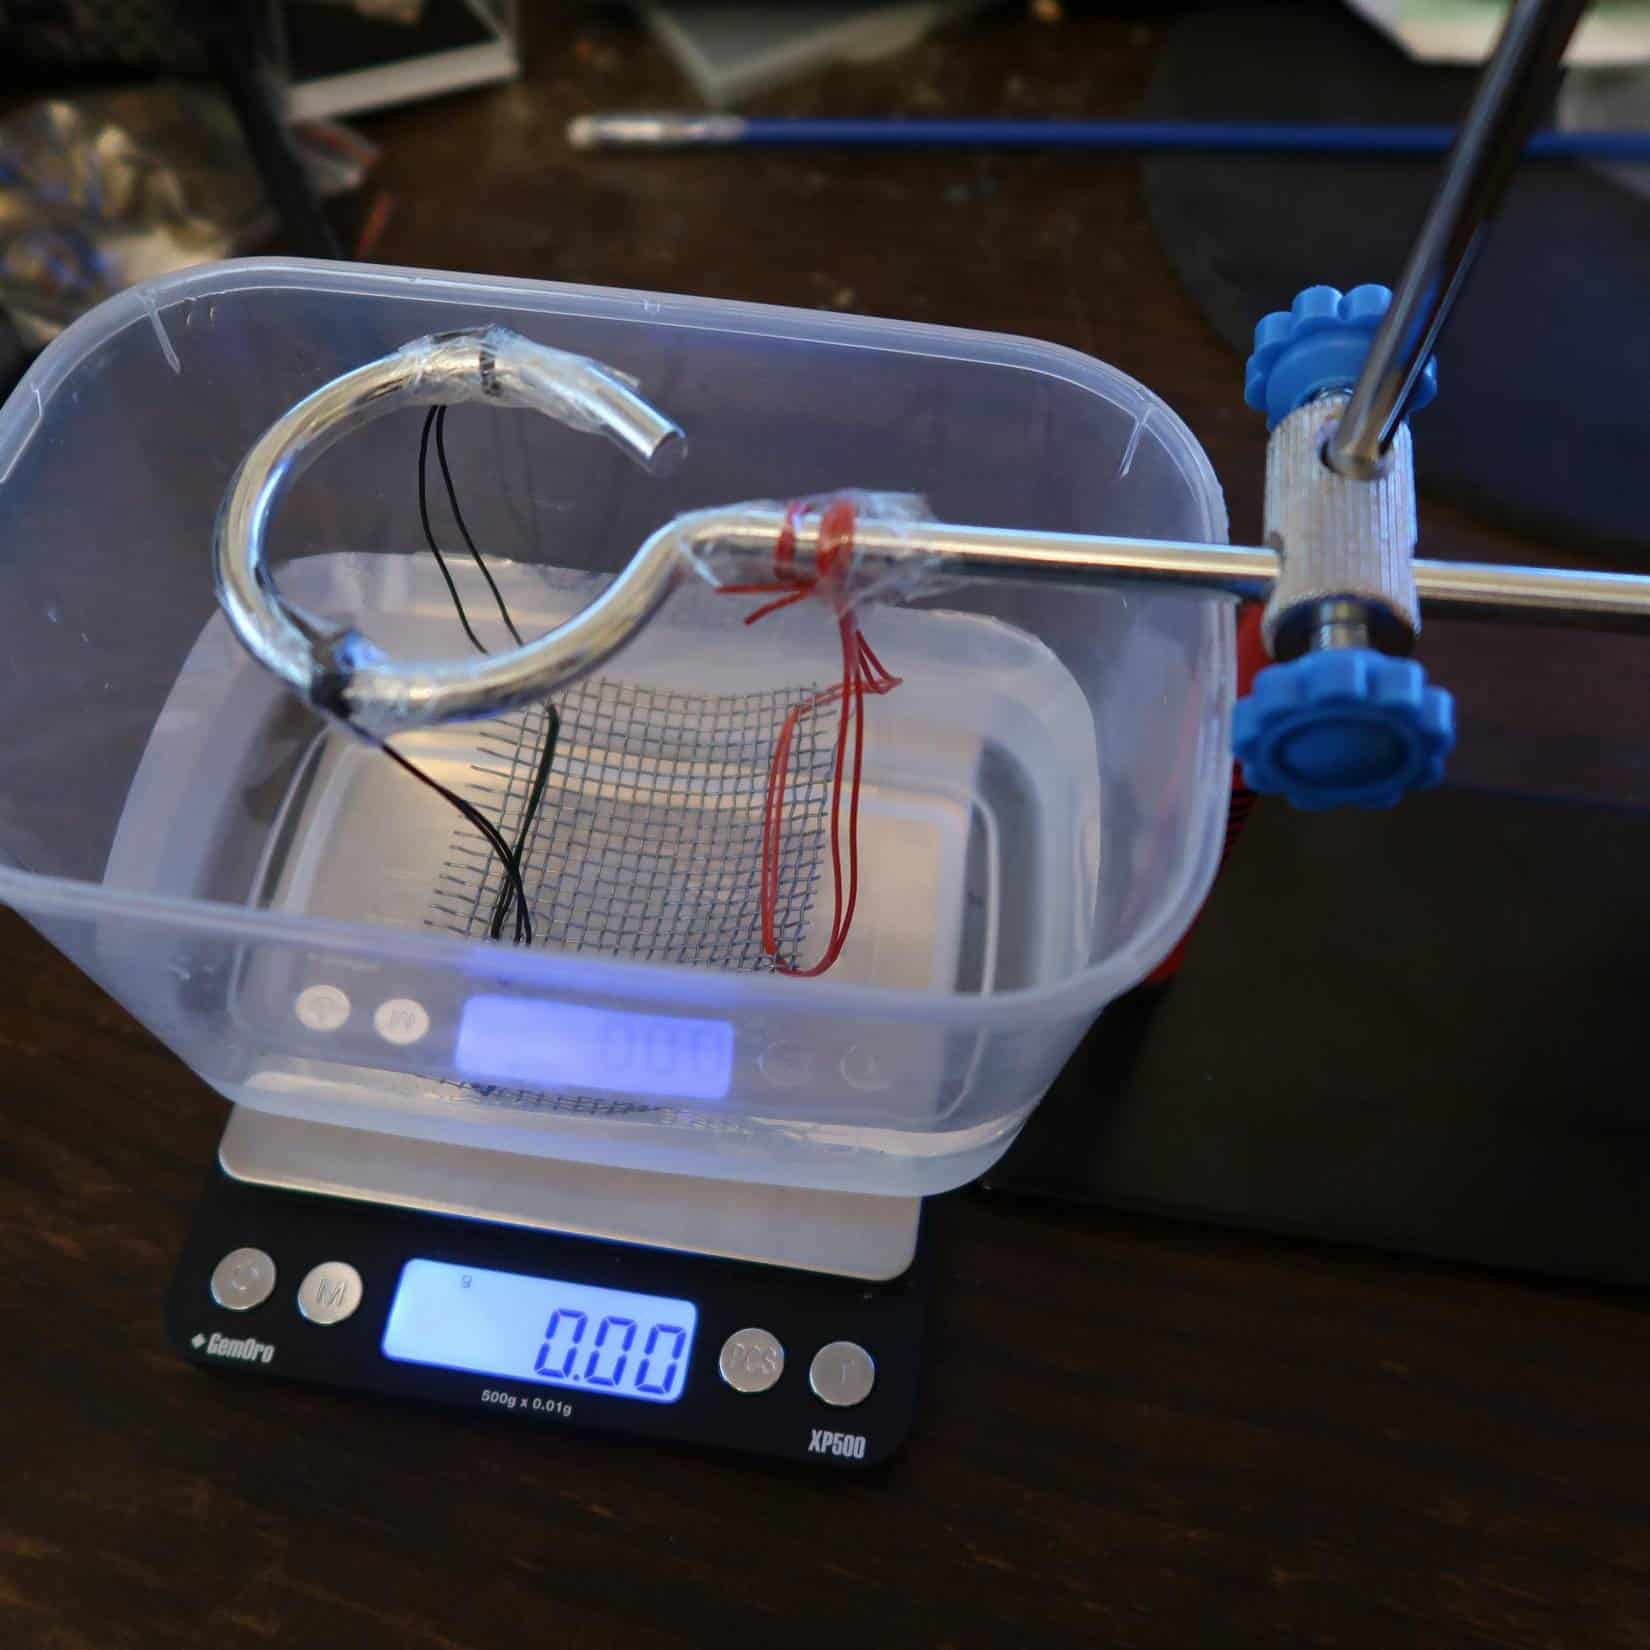
This photo shows the whole assembly, before use.
What I’ve done is used the laboratory stands base as a counterweight. The lab stand and pen match the height of my scale and water container almost perfectly, just a MM or two over the top of the water container, which is exactly what I wanted.

The wires holding up the ‘basket’ have been tied to ensure they cannot be long enough to touch the bottom of the water tank.
If the wires, basket, or specimen come into contact with the bottom or the sides of the water container, this system will not work. You are weighing it “in water”, not “in air”.

As you can see, luckily the pen tube was pretty much a perfect size.
This is here for two reasons – firstly, as mentioned above, to stop the basket touching the bottom of the water tank. More importantly, the presence of a stopper (the pen barrel) means the basket will be at the same depth in the water each time.

When the scale is turned on, the water will be weighed. This figure is irrelevant for our purposes.
When the basket is lowered into the water, the figure will change. After the empty basket has been submerged to the depth of your stopper tube, tare the scale.
Tare is a feature on scientific scales which causes the scale to ignore the 300 grams or whatever of water that is weighing down on it already and only mention any additional weight that is added.
When the scale is tared to 0.00g, this means the container, water, and basket are being ignored by the scale.
This is why the stopper tube is essential in this design; it stops any variation between the amounts of wire/rope/string being lowered into the water. If the scale was cleared with 5mm of rope in the water, and then the specimen was weighed with 20MM of rope in, the results would be flawed.

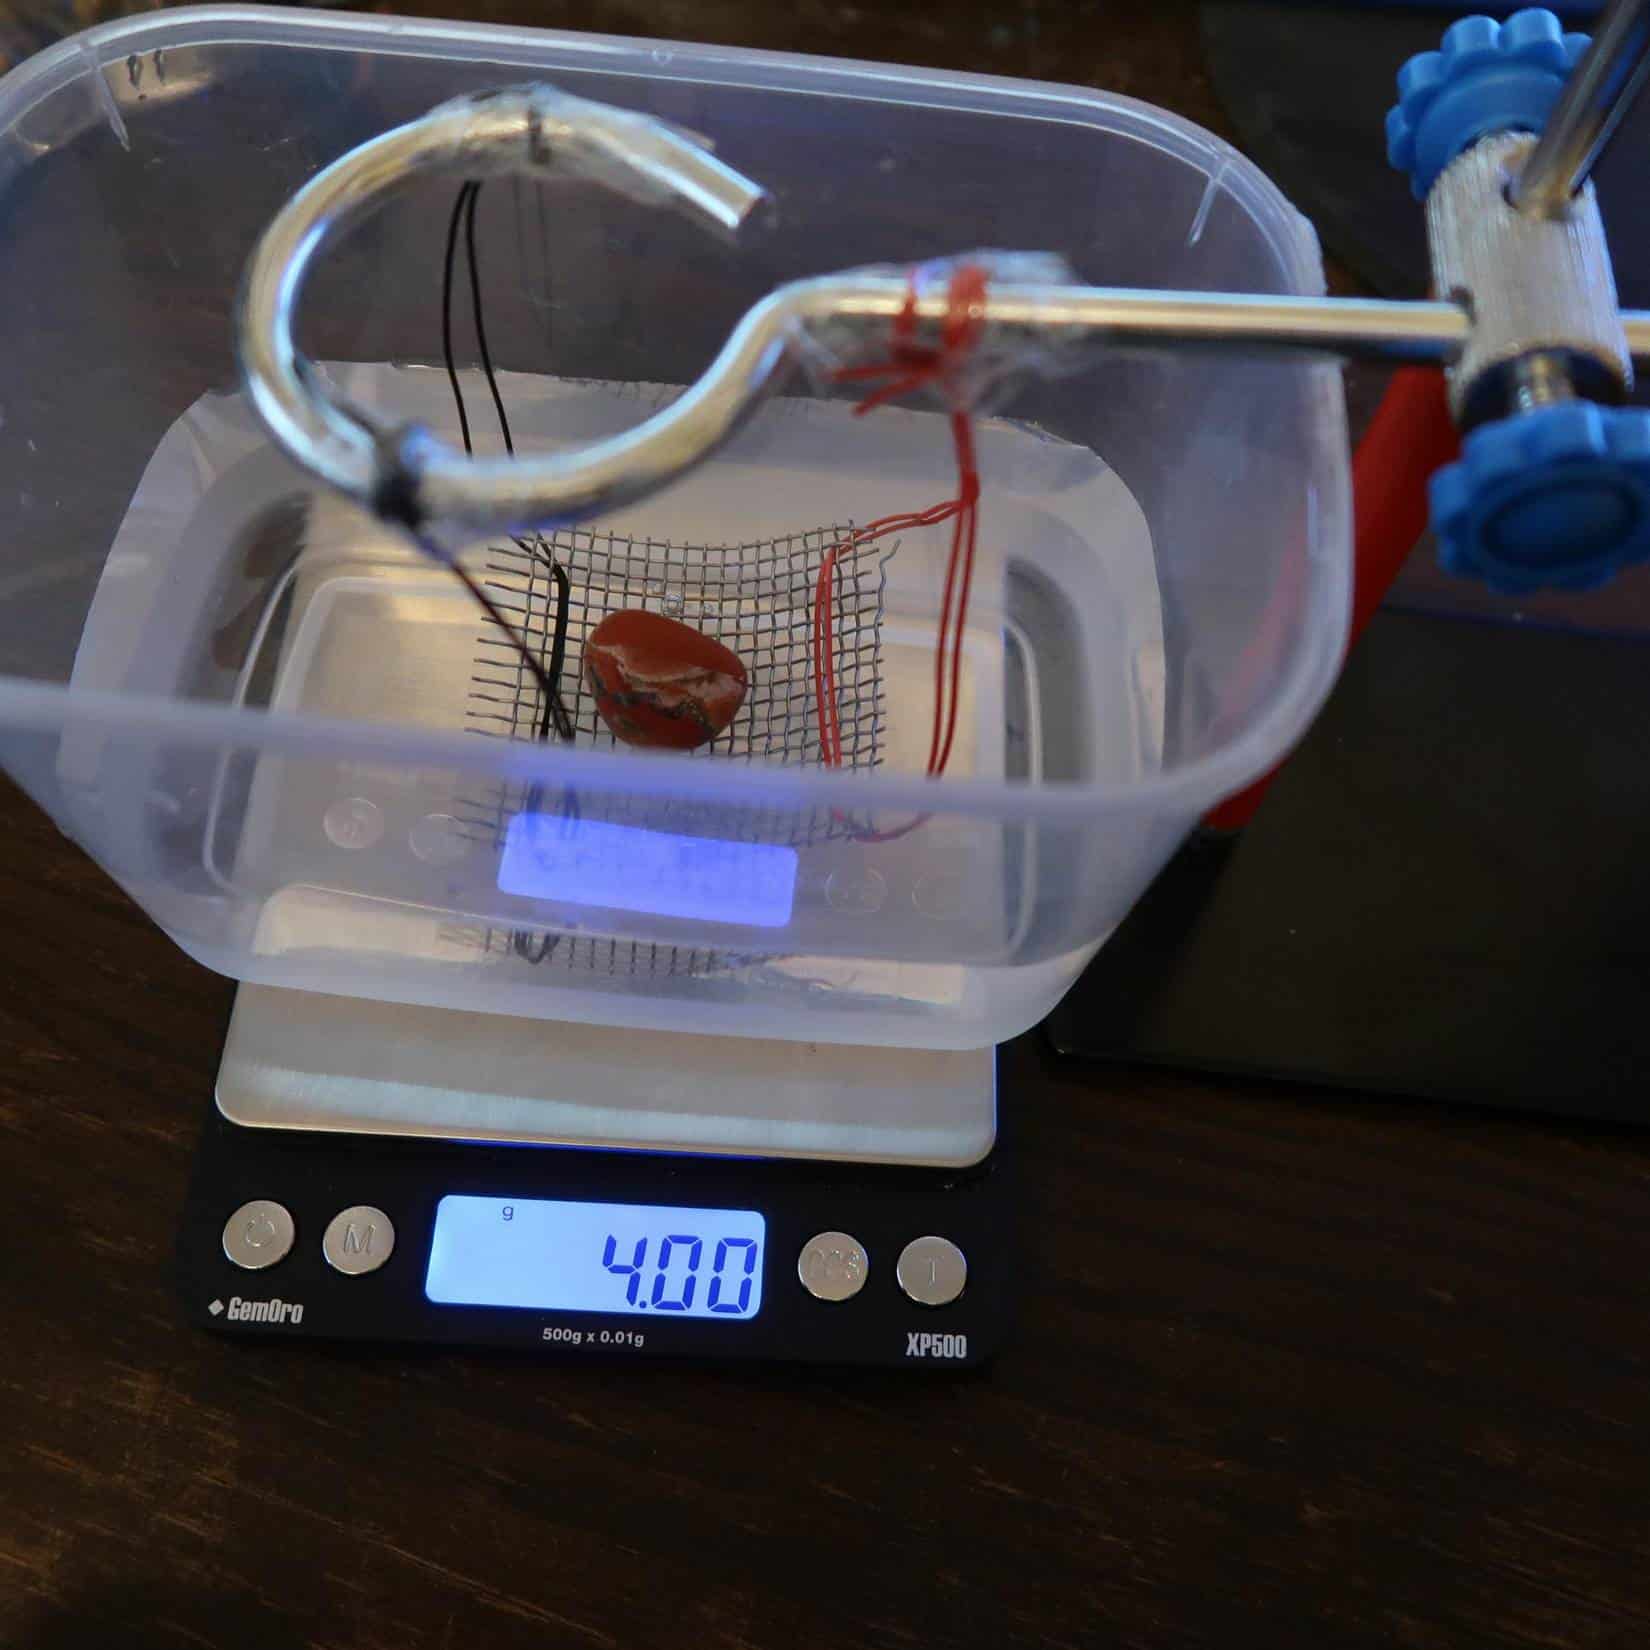
At this point, you can either raise the basket and place your specimen on it before lowering the basket again, or you can just drop it through that handy hole in the stand.
I won’t judge you.
As you can see, the specimen has a weight of 4 grams in water, sometimes referred to as W/W – water weight. Note this figure down.
I was incredibly lucky to get a 4 gram weight, it usually ends up being 3.916g or something more annoying.

Alright, so, you’ve messed around for ten minutes and got the wet weight of the stone.
Now dry the stone out and weigh it for its ‘in air’ weight. I haven’t included a photo of that – frankly, it seemed unnecessary.
This stone weighed 11.32 grams in air, and 4 grams in water. From there, we do a simple sum – air weight / water weight = specific gravity.
In this case, it would be 11.32 ÷ 4 = 2.83. Specific gravity does not have a unit – it is a ratio showing the density between weights in different substances.
Now, I would recommend practising with some known pieces to begin with. This was a known piece, a jasper tumblestone. Gemdat places the specific gravity of Jasper at 2.58 to 2.91, Wikipedia at 2.5 to 2.9 typically.
If you are not aware of what the material is, we head to a website called Mindat, which has a search functionality that allows you to search by mineral properties.
In the case of this tumblestone, we can fill in the specific gravity part of the search – I like to give it a little leeway as I’m sure the method is not 100% accurate. So, I’ve put 2.6 to 2.9 into Mindat.
To narrow it down, we can fill in the Diapheny section too; it is clearly Opaque – we can fill in the colour. Performing a Mohs test will give us a hardness if we need to narrow down the search results more.
There may be other tests you can do to further narrow things down. There will always be numerous results, but your unknown specimen is now narrowed down to one of a few.
Hope that helps. Please feel free to have a look at our ‘testing and identification’ page!
This method is based on John Betts quick and easy test, with a few alterations of my own to make it a bit more repeatable.

Well done well explained